There's nothing quite like the peace of mind that comes with reliable power, especially when you're far from the grid. For many RVers, that dependable power source is their Onan generator. But like any complex piece of machinery, an Onan generator needs regular care to perform its best and avoid untimely breakdowns. Mastering your Onan Generator Routine Maintenance & Service Intervals isn't just about extending its lifespan; it's about ensuring your adventures never go dark.
This isn't just a chore list; it's your playbook for keeping your generator humming happily, year after year. From oil changes to coolant flushes, we'll demystify the essential tasks, when to do them, and whether you can tackle them yourself or if it’s time to call in a pro.
At a Glance: Keeping Your Onan in Peak Condition
- Exercise Regularly: Run your generator monthly for 1-2 hours under a substantial load to prevent "lot rot."
- Consult Your Manual First: Always check your specific Onan model's owner's manual for precise intervals and procedures.
- Key Intervals: Expect annual/150-hour oil changes, biennial/500-hour fuel filter changes, and more.
- Dust & Heat Demand More: Increase maintenance frequency if operating in harsh conditions.
- Document Everything: Keep a detailed maintenance log for optimal service life and warranty support.
- DIY or Pro? Base your decision on tool availability, location, confidence, and the complexity of the task.
Why Your Onan Generator Deserves TLC: Preventing "Lot Rot"
Imagine buying a brand-new car and letting it sit in your driveway for months on end, only firing it up for short bursts. You wouldn't expect it to run perfectly when you finally need it for a long trip, would you? The same principle applies to your Onan generator.
One of the biggest culprits behind generator problems isn't overuse, but underuse. Seasoned RVers and technicians refer to this as "lot rot." Components like fuel lines, carburetors, and seals can degrade, gum up, or dry out when a generator sits idle for too long, especially with modern ethanol-blended fuels.
The fix is surprisingly simple: exercise your generator. At least once a month, start your generator and let it warm up. Then, add a substantial load – think high-draw items like your RV's battery charger (you might be surprised by different types of RV battery chargers), electric water heater, or air conditioning/heat pump. Run it like this for at least one to two hours. This circulates fluids, lubricates seals, burns off deposits, and keeps all systems ready for action. If you regularly use your generator for routine power, separate exercise sessions aren't necessary. It's about consistent operation under load.
DIY vs. Professional Service: Finding Your Comfort Zone
When it comes to generator maintenance, you have a choice: roll up your sleeves or hand it over to a professional. There's no single "right" answer; it depends entirely on your specific situation.
- Tool Availability: Do you have the necessary wrenches, drain pans, and safety gear? Some tasks, like an oil change, require common tools, while a coolant flush can demand a more specialized setup.
- Suitable Work Location: Can you safely access your generator underneath your RV? Do you have a clean, level surface and a way to properly dispose of used fluids?
- Confidence & Competence: Are you comfortable working with mechanical components, potentially handling fuel or hot fluids? If you're unsure, it's always safer to err on the side of caution.
- Time & Preference: Some RV owners enjoy the satisfaction of doing their own maintenance. Others prefer to spend their time elsewhere and let experts handle it.
Many routine tasks are quite approachable for a DIYer, saving you money and giving you a deeper understanding of your rig. However, more complex or safety-critical jobs might be best entrusted to someone who performs Onan generator repair regularly.
Understanding Your Onan's Maintenance Schedule: The Golden Rule (and Exceptions)
Before you touch a wrench, your first point of reference should always be your specific generator's owner's manual. While we'll detail common intervals for a popular model, the Onan 7.5kW QuietDiesel, your particular unit might have different recommendations. The manual is the ultimate authority for your generator.
When Conditions Demand More:
The stated service intervals are typically for "normal" operating conditions. However, RV life often means anything but normal. If you operate your generator in:
- Hot Climates: High ambient temperatures put more stress on the engine and cooling system.
- Dusty Environments: Driving on gravel roads, camping in desert areas, or prolonged use in dusty conditions will quickly clog air filters and potentially impact other systems.
In these scenarios, it's wise to perform maintenance operations more frequently than the manual suggests. Listen to your generator, inspect it regularly, and use common sense. A visual check can often tell you if an air filter, for example, is looking prematurely dirty.
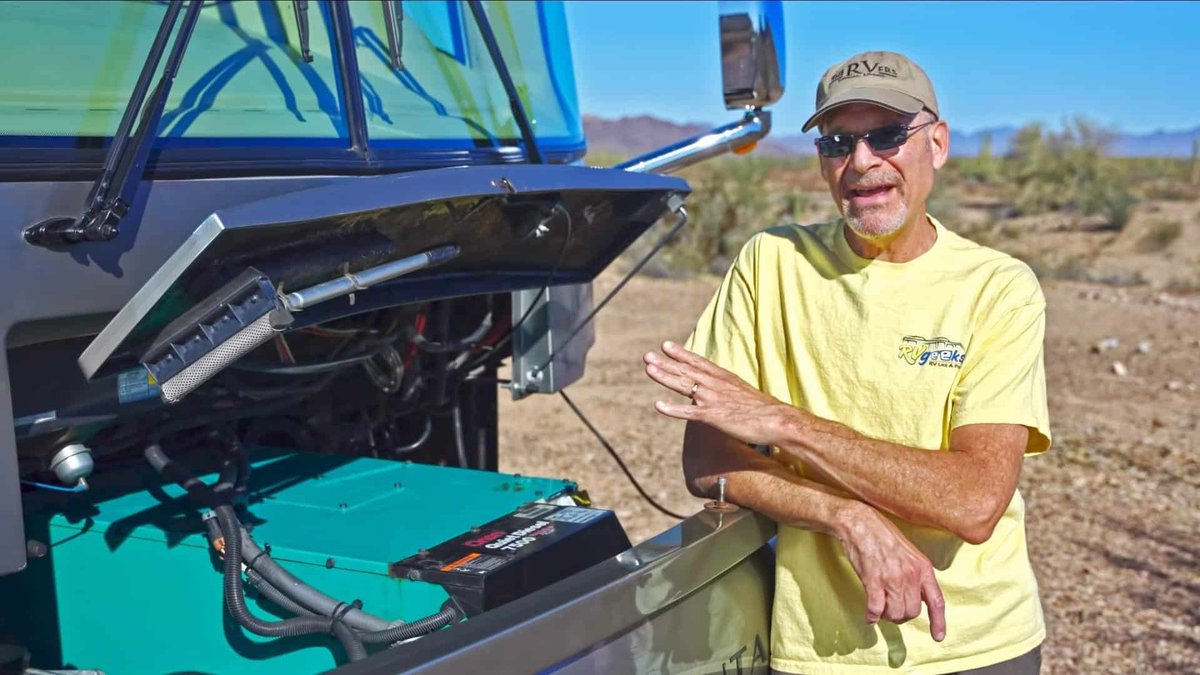
Key Maintenance Tasks & Their Timelines (Based on Onan 7.5kW QuietDiesel)
Let's dive into the core tasks that will keep your Onan generator running reliably. We'll use the Onan 7.5kW QuietDiesel as our example, detailing common intervals and what's involved.
1. Oil and Oil Filter Change: The Lifeblood of Your Engine
- Interval: Every year or 150 hours, whichever comes first.
- Why It Matters: Engine oil lubricates moving parts, prevents corrosion, cools the engine, and cleans by carrying away contaminants. Over time, oil degrades and loses its protective qualities, while the filter traps harmful particles. Fresh oil and a clean filter are fundamental to engine longevity.
- DIY Pointers: This is one of the most common and relatively easy DIY tasks for many RVers.
- Tools You'll Need: An oil drain pan, replacement oil (check your manual for the correct type and viscosity, often 15W-40 for diesels) and filter, a socket wrench (often ⅜-inch drive, 11/16-inch socket for the drain plug), a long extension for easier access, nitrile gloves, and plenty of rags.
- Procedure (General): Run the generator for a few minutes to warm the oil, making it drain easier. Turn it off. Place the drain pan underneath. Remove the drain plug and let the old oil completely empty. Replace the drain plug. Use an oil filter wrench to remove the old filter, clean the mating surface, apply a thin film of new oil to the gasket of the new filter, and hand-tighten the new filter according to specifications. Finally, refill with the correct amount of new oil, checking the dipstick. Dispose of used oil responsibly.
2. Spark Arrestor Cleaning: Keeping Exhaust Flowing Free
- Interval: Every year or 150 hours, whichever comes first.
- Why It Matters: The spark arrestor is a critical safety device designed to trap carbon particles from the exhaust. Without it, hot embers could ignite dry grass or other flammable materials around your RV. Over time, these particles can accumulate, plugging the arrestor, leading to poor generator performance, excessive backpressure, and even premature shutdown.
- DIY Pointers: This task is often conveniently done concurrently with an oil change, as you're already accessing the underside of the generator.
- Tools: Usually a socket wrench and sometimes a wire brush or scraper. Check your specific model's manual for access and cleaning instructions.
- Procedure (General): Locate the spark arrestor (often a small screen or baffle at the end of the exhaust system). Remove it carefully, clean out any carbon buildup with a wire brush, and then reinstall it.
3. Air Filter Replacement: Breathing Easy, Running Strong
- Interval: Every 500 hours or every year, or more often if operated in dusty environments.
- Why It Matters: Just like your RV's engine, your generator's engine needs clean air to combust fuel efficiently. A dirty air filter restricts airflow, forcing the engine to work harder, decreasing power output, increasing fuel consumption, and potentially leading to premature wear.
- DIY Pointers: This is typically one of the easiest maintenance tasks, often requiring no tools at all or just a screwdriver.
- Tools: Usually only a new air filter.
- Procedure (General): Locate the air filter housing, unlatch or unscrew it, remove the old filter, clean out any debris from the housing, and insert the new filter, ensuring it's seated properly.
4. Fuel Filter Change: Protecting Your Fuel System
- Interval: Every 500 hours or every two years, whichever comes first.
- Why It Matters: The fuel filter prevents contaminants like dirt, rust, and water from reaching sensitive fuel injectors and the engine. Over time, it collects these impurities and can become clogged, leading to fuel starvation, erratic operation, reduced power, or even complete generator shutdown. Given the potential for issues with other RV systems that rely on fuel or power, a clean fuel supply is paramount.
- DIY Pointers: Access to the fuel filter varies by model; on the Onan 7.5kW QuietDiesel, it's generally accessible from underneath the generator. Be prepared for a small amount of fuel drainage.
- Tools: A mat for working underneath, an oil drain pan (or small container for fuel), open-end and socket wrenches, a rag, nitrile gloves, and the replacement filter.
- Procedure (General): With the generator cold and fuel supply potentially shut off (check manual), place a pan underneath the filter. Carefully loosen and remove the old filter. A small amount of fuel will drain, which is normal. Install the new filter, making sure any O-rings are correctly seated and tightened to specifications. Prime the fuel system if required by your manual (often by running the generator for a few seconds after changing).
5. Coolant Flushing and Changing: Keeping Your Cool
- Interval: Every 1,000 hours or every two years, whichever comes first. (Using OAT long-life coolant can extend this to four years).
- Why It Matters: Engine coolant (antifreeze) plays a vital role in regulating engine temperature, preventing overheating, and protecting internal components from corrosion and freezing. Over time, the protective additives in coolant break down, making it less effective and potentially allowing corrosion to damage the cooling system.
- DIY vs. Professional: This is generally the most time-consuming and involved maintenance task. If you lack fresh water access, the right tools, or dedicated time, it's often best left to professionals. Handling coolant requires care due to its toxicity.
- Tools: A mat, good quality antifreeze (OAT long-life pre-mixed is highly recommended, containing rust/corrosion inhibitors and no stop-leak additives), distilled/de-ionized water (if you're using concentrate), radiator flush product, a new radiator pressure cap (good practice to replace it), a 10mm socket wrench, a funnel, rubber gloves, rags, a large pan for used antifreeze, and fresh water.
- Safety First: Handle coolant only when the engine is completely cold to avoid severe burns.
- Procedure (General): Drain the old coolant into a pan. Flush the system with clean water and a radiator flush product following the product's instructions. Drain completely. Refill with fresh coolant, ensuring all air pockets are bled from the system (often by running the engine with the cap off until it reaches operating temperature and topping off). Replace the radiator cap. Dispose of used coolant properly at a hazardous waste facility. For those interested in deeper parallels, consider preventative maintenance for your RV's main engine, which often involves similar coolant system care.
Beyond the Basics: General Cummins Generator Maintenance Wisdom
Onan generators are part of the Cummins family, and a few overarching principles apply to all their power products.
- Follow Your Operator's Manual: We can't stress this enough. Your manual is tailor-made for your specific model and contains precise instructions for all normal periodic maintenance.
- The Power of Documentation: Maintain a detailed log of all maintenance performed, including dates, hours run, and parts replaced. This not only helps you optimize service life but is also crucial for supporting any warranty claims you might need to make down the line. Tools like the RV Life Maintenance Tracker can be invaluable for this.
- Emission Control Devices: Your generator, like your RV's main engine, has emission control devices and systems. Any engine repair establishment can perform maintenance, replacement, or repair of these components. However, for warranty work specifically related to Cummins products, always use an authorized Cummins dealer or distributor.
- When in Doubt, Ask a Pro: Don't guess if you're uncertain about a procedure or notice an unusual symptom. Always contact a Cummins dealer or certified technician for advice. Attempting a repair beyond your skill level can lead to further damage or safety hazards. For instance, if you hear an unusual noise when your AC is running, it could be related to generator strain; consider consulting resources on common RV air conditioner repairs for related issues.
Common Questions & Troubleshooting Tidbits
Even with a solid maintenance plan, questions pop up. Here are a few common ones:
- "My generator barely has any hours, why is it failing?"
This circles back to "lot rot." Low hours don't equal a problem-free generator. In fact, units with fewer hours often experience more problems due to lack of exercise. Mechanical components need regular use to stay lubricated and prevent seizing or gumming up. The best defense is your monthly exercise routine. - "Can I use automotive oil in my Onan generator?"
Generally, no. While some generators might tolerate it, Onan specifically designs its generators and recommends specific types of oils that meet their demanding specifications, especially for air-cooled models which run hotter. Always refer to your owner's manual for the precise oil type (e.g., diesel-rated 15W-40 for QuietDiesel models). Using the wrong oil can void your warranty and lead to premature engine wear. - "What happens if I skip a service interval?"
Skipping maintenance can lead to a cascade of problems. A dirty air filter might reduce power and increase fuel consumption. Old oil can cause excessive wear. A clogged fuel filter can starve the engine. Over time, these minor neglects can snowball into major, expensive repairs or even complete generator failure, often at the most inconvenient times. Consistency is key to reliability. - "How do I dispose of used fluids?"
Used oil, fuel, and coolant are hazardous materials and must be disposed of responsibly. Many auto parts stores, municipal waste facilities, or service centers will accept these fluids for recycling or proper disposal. Never pour them down drains or onto the ground. This diligence is part of a larger ethos of responsible RV care, much like understanding your complete guide to RV winterization.
Your Next Steps for a Healthy Generator
Taking proactive steps now will save you headaches and expense later. Don't wait for your generator to sputter to life (or not at all) before you pay it some attention.
- Locate Your Manual: If you don't have it, download a digital copy for your specific Onan model from Cummins's website. Keep it accessible.
- Start a Maintenance Log: Whether it's a notebook, a spreadsheet, or a dedicated app, begin tracking your generator's hours and every service performed.
- Schedule Your Next Service: Based on your current hours and the intervals discussed, mark your calendar for your generator's next oil change, filter replacements, or other crucial tasks.
- Commit to Regular Exercise: Make that monthly run a non-negotiable part of your RV routine.
With a little attention and adherence to a sensible schedule, your Onan generator will remain a steadfast source of power, letting you enjoy the freedom of the open road, wherever it may lead.